Networking functions
connman
connman connects wifi and ethernet (SMSC9514 USB 4p+LAN hub) or ethernet-over-usb (gadget).
You might need to systemctl enable connman && systemctl start connman once.
Ethernet
SMSC LAN9514 4p usb/ethernet hub works without configuration. But you can turn it off with connmanctl.
connmanctl
disable ethernet
Wifi
It may be soft blocked. To unblock use connmanctl.
connmanctl
enable wifi
agent on
enable wifi
scan wifi
services
connect wifi_12345678_123......910_managed_psk
and enter your password
The following method to unblock works but I consider this obsolete:
root@edison:~# rfkill list

0: phy0: wlan
        Soft blocked: yes
        Hard blocked: no

root@edison:~# rfkill unblock 0
root@edison:~# rfkill list
0: phy0: wlan
        Soft blocked: no
        Hard blocked: no
To unblock wifi and bluetooth simultaneously:
rfkill unblock all
Wifi tethering
The current version of connmanctl take care of tethering without the use of hostapd. Therefore we removed hostapd. Instructions for enabling a wifi access point:
connmanctl
enable wifi
tether wifi on <ssid> <passphrase with at least 8 chars>
To quickly switch between Access Point and Wifi:
ap-mode-toggle start | stop | status | toggle
You must have manually setup a tether previously using connmanctl, the stored ssid and passphrase will be used.
Gadget
It may be powered off. To power on use connmanctl.
connmanctl
enable gadget
services
connect gadget_aabbccddeef1_usb
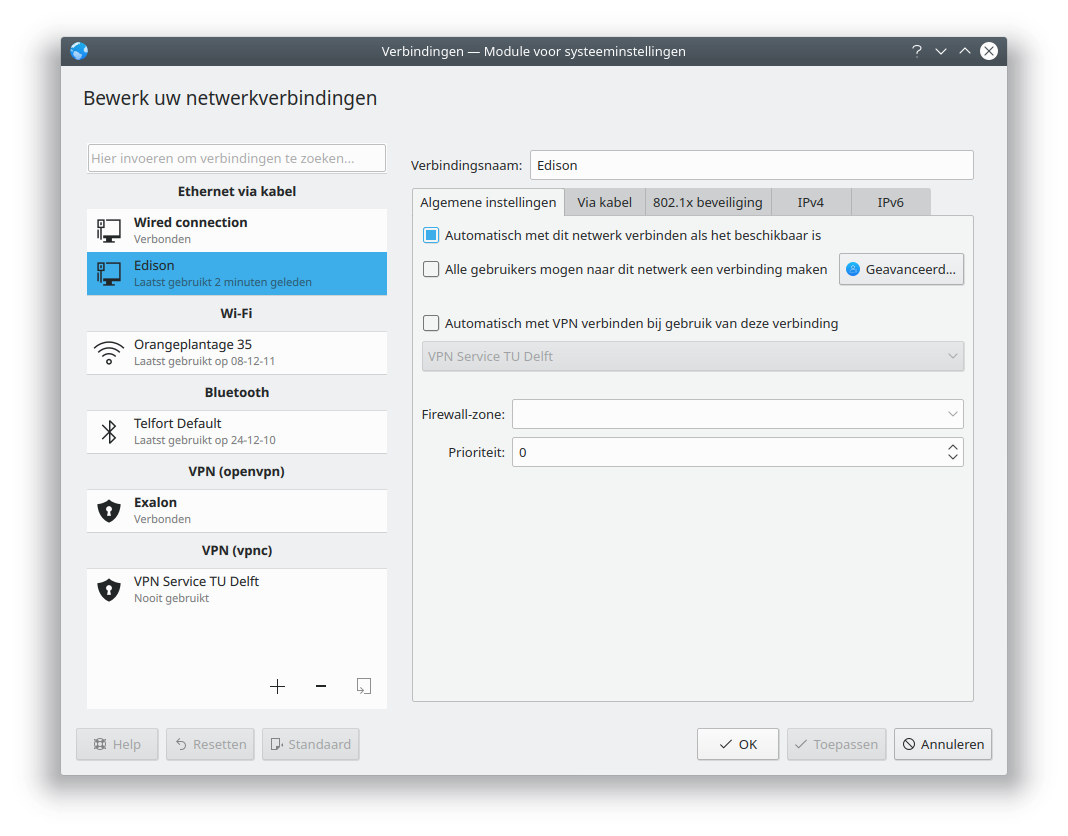
To make a shared network you need to configure the host computer. On KDE5/6 (Kubuntu 18.10 - 24.04) create a new connection using Plasma Network Manager:

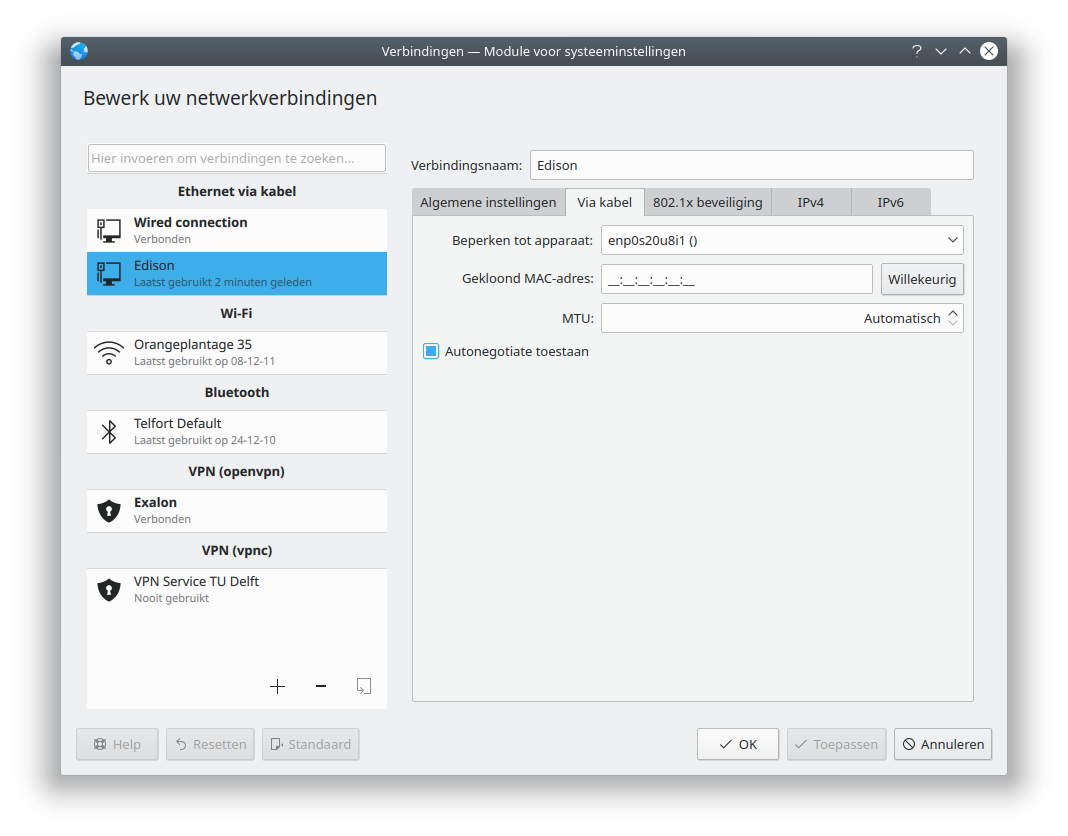
Make this network active only on the shared network device:

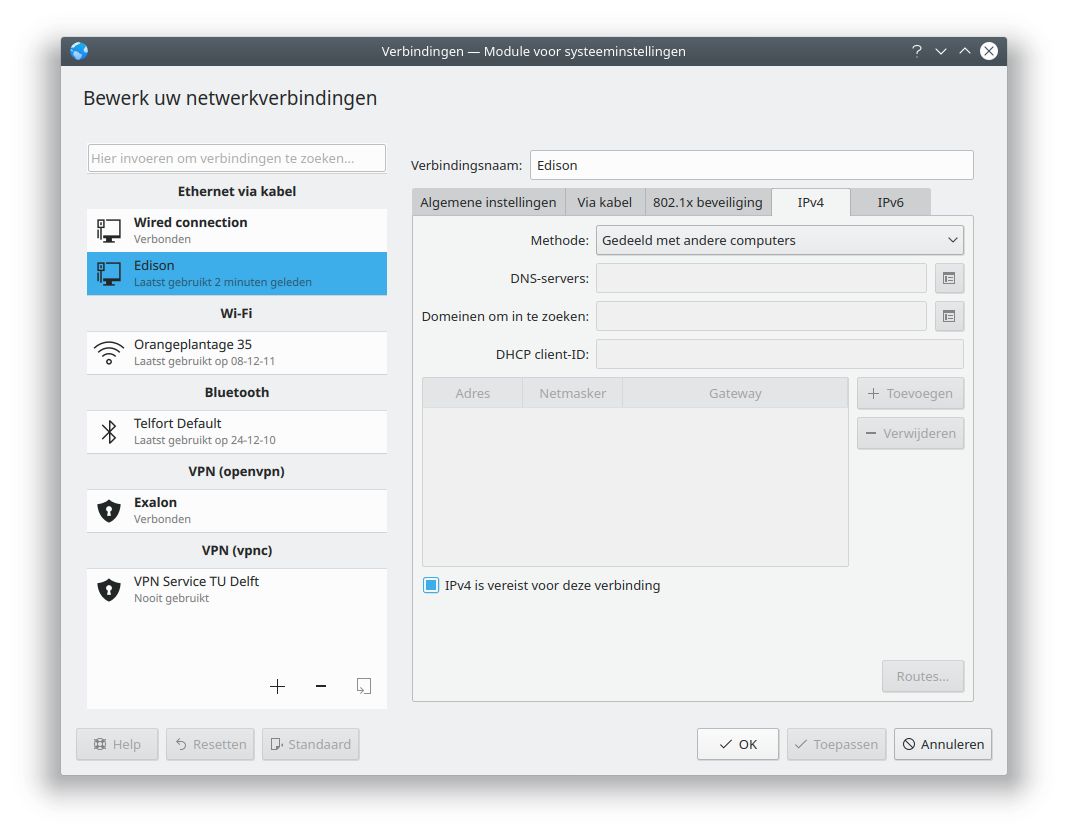
Select shared with other computers:

Other network manager based desktops will require similar steps.
You will likely want to run a DNS server on this shared connection. This appears to be simple, install dnsmasq on the host and let Network Manager handle it.
sudo apt-fet instaldnsmasq

sudo vi /etc/NetworkManager/NetworkManager.conf
and put under [main]
[main]
dns=dnsmasq
Openvpn
Create a directory /var/lib/connman-vpn/ containing your myhost.config file. myhost can be whatever you like, the extension must be .config. If you have a working openvpn connection (f.i. on your desktop) you already have working certificate files. Place them under /etc/openvpn/.
Sample myhost.config
[provider_MyHost]
Type = OpenVPN
Name = MyHost
Host = my.host.com
Domain = office
OpenVPN.CACert = /etc/openvpn/cacert.pem
OpenVPN.Cert = /etc/openvpn/user-certificate.pem
OpenVPN.Key = /etc/openvpn/user-key.pem
OpenVPN.Proto = udp
OpenVPN.CompLZO = yes
Then start the connman-vpn service:
systemctl start connman-vpn && systemctl enable connman-vpn
Now, when you start connmanctl services your vpn connection should be listed:
root@edison:~# connmanctl services
* R MyHost        vpn_my_host_com_office
*AO MyWifi        wifi_..._..._managed_psk
PPP
ppp is a way to pass an internet connection across a serial line. The line must be full duplex. If you have 2 Edison-Arduino’s you can connect the serial ports together. On Edison-Arduino #1 the Digital header pin 0 (RX) must be tied to pin 1 (TX) of Edison-Arduino #2 and vice versa. I found I need to connect at least 3 GND’s to suppress HF interference (my wires are 10 cm long), for this I used pin 14 (GND) on the Digital header and the 2 GND pins on the Power header.
Setup the serial ports
Currently the UART pins are not correctly setup. This is an open bug in the initrd init script. To setup manually:
gpioset `gpiofind TRI_STATE_ALL`=0 && gpioset `gpiofind TRI_STATE_ALL`=1
Test the connection
To test the connection start a terminal on the console on both Edison-Arduino’s:
screen /dev/ttyS1 2000000
Whatever you type into the one Edison-Arduino console will appear on the other.
Setup ppp
One Edison-Arduino #1 create file /etc/ppp/options.ttyS1:
noauth
nocrtscts
xonxoff
passive
local
maxfail 0
defaultroute
persist
nodetach
192.168.5.101:192.168.5.100
One Edison-Arduino #2 create file /etc/ppp/options.ttyS1:
noauth
nocrtscts
xonxoff
passive
local
maxfail 0
nodetach
192.168.5.100:192.168.5.101
persist
proxyarp
Prevent DMA from sleeping
We need to prevent the dma controller from entering a sleep state (as waking up can take a long time and cause communication errors, see HSU. The easiest way to do this without coding is to run cyclictest in the background.
Run cyclictest on both Edison-Arduino’s:
cyclictest > /dev/null &
cyclictest sets /dev/cpu_dma_latency to 0. You can not simply echo 0 to this file as it will return to its original value when echo terminate. However, the following will work:
exec 3<> /dev/cpu_dma_latency; echo "0xhhhhhhhh_hexadecimal_latency_in_uS" >&3

root@yuna:~# xxd -l 16 -p /dev/cpu_dma_latency
00943577
This must be read as 0x77359400 or 2000 sec. (https://blog.csdn.net/msdnchina/article/details/98659435)
Test the ppp connection
On both Edison-Arduino’s start the ppp server:
pppd /dev/ttyS1 2000000 &
To test the connection, on one Edison-Arduino start iperf3 as a server, on the other as client:
iperf3 -s
and
iperf3 -c 192.168.5.100
This will generate output similar to:
root@edison:~# iperf3 -c 192.168.5.100
Connecting to host 192.168.5.100, port 5201
[  5] local 192.168.5.101 port 44286 connected to 192.168.5.100 port 5201
[ ID] Interval           Transfer     Bitrate         Retr  Cwnd
[  5]   0.00-1.00   sec   387 KBytes  3.17 Mbits/sec    0   33.9 KBytes
[  5]   1.00-2.00   sec   164 KBytes  1.34 Mbits/sec    0   33.9 KBytes
[  5]   2.00-3.00   sec   195 KBytes  1.60 Mbits/sec    0   33.9 KBytes
[  5]   3.00-4.00   sec   195 KBytes  1.60 Mbits/sec    0   33.9 KBytes
[  5]   4.00-5.00   sec   195 KBytes  1.60 Mbits/sec    0   33.9 KBytes
[  5]   5.00-6.00   sec  97.6 KBytes   799 Kbits/sec    0   33.9 KBytes
[  5]   6.00-7.00   sec   195 KBytes  1.60 Mbits/sec    0   33.9 KBytes
[  5]   7.00-8.00   sec   195 KBytes  1.60 Mbits/sec    0   33.9 KBytes
[  5]   8.00-9.00   sec   195 KBytes  1.60 Mbits/sec    0   33.9 KBytes
[  5]   9.00-10.00  sec   201 KBytes  1.65 Mbits/sec    0   33.9 KBytes
- - - - - - - - - - - - - - - - - - - - - - - - -
[ ID] Interval           Transfer     Bitrate         Retr
[  5]   0.00-10.00  sec  1.97 MBytes  1.66 Mbits/sec    0             sender
[  5]   0.00-10.05  sec  1.81 MBytes  1.51 Mbits/sec                  receiver

iperf Done.
If all goes will there will have been 0 transmission errors:
root@edison:~# ifconfig
...
ppp0: flags=4305<UP,POINTOPOINT,RUNNING,NOARP,MULTICAST>  mtu 1500
        inet 192.168.5.101  netmask 255.255.255.255  destination 192.168.5.100
        ppp  txqueuelen 3  (Point-to-Point Protocol)
        RX packets 618  bytes 32205 (31.4 KiB)
        RX errors 0  dropped 0  overruns 0  frame 0
        TX packets 1349  bytes 1987637 (1.8 MiB)
        TX errors 0  dropped 0 overruns 0  carrier 0  collisions 0
...
Setup up routes etc.
You probably want to setup routes etc. Unfortunately doing ppp with connmanctl and having that take care of setting up conenctions, routes etc. using a NULL modem is not supported currently. You need to do that manually.
Further info can be found here How-To: Ethernet Bridge over serial(or xbee).